This may be a bit of an unusual post for this blog, but it still fits into the bigger picture. So here we go…
For years I wanted to have a digital photo frame. One of these devices that hang on the wall and make the thousands and thousand of pictures taken over many years visible. Although I can look at them on my phone, this would something that I need to do actively. A framed picture is just there, waiting for me. A picture on the wall is also an invitation to talk about it, much more than the relative privacy of a phone screen.
But all the devices I did see whenever I looked were shit. Not necessarily the build or picture quality, but the thinly veiled vendor lock-in, unmaintained apps, short-lived mandatory cloud-services – blueprints of a path towards unwanted liabilities, privacy violations, and electronic waste.
So I built one … finally.
The (electronic) hardware
The main piece is an LCD screen (B140HAN01.1), salved from a 10 year old laptop. This is not a super-slick OLED screen, but still has nice colors and full-HD resolution. It is only 3mm thick
It didn’t take long to find a driver board on eBay. Luckily, it had USB-C connectivity, over which it also takes video and audio. This makes it possible to connect a phone, and use the frame as an external screen. A phone can even power the whole screen! The thickest part is the mini HDMI connector at ~3mm.
The brain of the frame is a Raspberry Pi 2 W. The variant without the pins is both tiny and thin, even thinner than the screen driver board.
The main hardware challenge was to connect the HDMI ports of the driver board and the Raspberry Pi. It is surprisingly difficult to find a cable with two male mini HDMI connectors, not to speak of a short, or flat one. I ended up using two adapters and a 10 cm cable with regular HDMI connectors. These adapters are by far the bulkiest part of the entire assemble.
The last hardware piece was a 128 GB SD card to put the OS and pictures on.
The software
The Raspberry Pi has four cores, 512 MB RAM, and runs a regular Pi OS (Debian). This offers great flexibility regarding software choices. I wasn’t too interested in implementing a lot myself. It also turns out that a 20 megapixel image needs a lot of RAM in most potential pipelines. So after some exploring, I ended up with the following setup.
I use Pi OS in the lite version (no X, or desktop environment). I wrote it to the SD card using the official rpi-imager. The configuration and installed software is all default, except for three things: 1) I added vt.global_cursor_default=0 as a boot parameter to /boot/firmware/cmdline.txt. This turns the blinking console cursor off. The reason for that will be clear in a moment. 2) I configured the desired screen rotation in /boot/firmware/config.txt (set display_hdmi_rotate= and comment out dtoverlay=vc4-kms-v3d to make it work). 3) I installed FIM via apt from the regular package repos.
FIM is a cool piece of software. It is an image viewer that can do everything that I want from a software that needs to orchestrate a slideshow with thousands of pictures. Aaand it can write directly to the framebuffer. This means no need for X, or any sort of graphical environment. Brilliant!
The general setup is: The pictures to show are stored on the SD card. When the system boots, it logs in a regular user automatically. Via .bashrc the fim slideshow is started automatically. That is unless SSH_CONNECTION is set, so I can also log in via that user, for example, to upload/delete pictures.
That is it! Almost…
The picture(s)
The screen has an aspect ratio of 16:9. Many digital photos will have something different than that. Simply showing any picture “fullscreen” would leave (large) parts of the screen empty. Not nice. Also, the screen isn’t square, so a decision needed to be made whether to hang it in portrait or landscape orientation.
After some playing around, it was clear that the frame should be in portrait orientation.
I decided that it would be best to preprocess all pictures to tune them for this display setup. Having made that decision, it also meant that all pictures could also be scaled to the exact resolution of the screen, thereby making them so small that all pictures could fit on the 128 GB SD card.
Portrait and landscape photos are processed differently (the source code of the Python script that does it all is at the end of this post). All the magic is done by ImageMagick.
Portrait pictures are converted to 1080x1920 pixels using an “area-fit” that implements a compromise between cropping and scaling.
There is no sensible way to convert a landscape image to a portrait image without ruining the composition. But just scaling the picture to fit the portrait screen would leave most of the screen empty. However, it turns out that stacking three landscape images vertically yields an aspect ratio that approaches 16:9! Given that randomly combining three images can easily look silly, I am sorting images within each album by date, and then stack the three landscape images that were taken “next” to each other. This works surprisingly well, and often produces montages that convey some idea of motion or actions. Nice!
Update workflow
Just dumping all possible pictures onto the photo frame would not yield an attractive presentation. To make things interesting, I wanted to shows pictures in random order. However, that also implies that each picture must be able to “speak for itself”, because it does not come with the context of the album it was taken from. Here is the approach that I am using for this curation step.
All source, full-resolution pictures are tracked in a git-annex repo, using a normalized file names based on the date a picture was taken. This normalization is done via exiftool and recorded with DataLad:
datalad run \
  -m "Normalized filenames" \
  exiftool \
    -d '%Y%m%d_%H%M%S%f_%.2c' \
    '-filename<${{DateTimeOriginal}}.%e' \
    '-filename<${{CreateDate}}.%e' \
    '-filename<${{MetadataDate}}.%e'  \
    '-filename<${{ModifyDate}}.%e' -r .
The results is a collection that can be sorted by time by sorting the file names, regardless of which device took the picture. This is helpful for getting the most appropriate triples of landscape pictures.
The pictures that end up on the photo frame are also tracked in another git-annex repository. This one has the repository with the source images as a submodule under .orig/. In addition, it has two more directories src/ and thumbs/. The contain the directories of the selected albums, and their names match the one in the source repo exactly. While thumbs/ contains the pictures that actually go to the photo frame (more on that in a moment), src/ contains symlinks to pictures in the source repo.
Now, for every album the following steps are done:
- Import a complete album as a collection of symlinks to the source repository pictures.
- Delete the links to all pictures that shall not be considered for the photo frame selection.
- Generate the pictures for the photo frame from the curated selection.
All three steps are also recorded with DataLad. Importing runs the following script with the path to the source album directory:
#!/bin/bash

trap "echo The script is terminated; exit" SIGINT

# take only the trailing (dir)name
destdir="src/$(basename "$1")"
mkdir -p "$destdir"

while IFS= read -r -d $'\0' src <&3; do
   # take only the filename and place in dest dir
   dest="${destdir}/$(basename "$src")"
   # only convert images for which no preview exists yet
   [ ! -e "$dest" ] && (file -L "${src}" | grep -qi 'image' ) && (
       ln -s "../../$src" "$dest"
   ) || echo "SKIP $dest" ;
done 3< <(find "$1" ! -type d -a ! -wholename '.orig/.git/*' -print0)
For picture (de)selection, I datalad-run an image viewer and delete what I do not want. On exit, it saves my selection by committing the symlink removals.
Generating the “thumbnail” images for the photo frame is done by sorting the source image files in an album (think find | sort), and feeding that file list to the STDIN of the following Python script. This script basically decides whether an image is portrait or landscape, and then uses ImageMagick to perform the processing described above. Again, the outcome is captured via datalad run.
import sys
import os
from PIL import Image

portrait_cmd = "magick '{fpath}' -auto-orient -thumbnail 2073600@ -gravity center -background black -extent 1080x1920 -set filename:f '{outdir}/%t.%e' +adjoin '%[filename:f]'"

landscape_cmd = 'magick montage {fpaths} -auto-orient -geometry 1080x640+2+2 -tile 1x{nimgs} -background black "{outdir}/montage{idx}.jpg"'

montages = 0
landscape_stack = []


def montage_stack():
    return landscape_cmd.format(
        fpaths=' '.join(f'"{fp}"' for fp in landscape_stack),
        outdir=sys.argv[1],
        idx=f'{montages}'.zfill(4),
        nimgs=len(landscape_stack)
    )


for f in sys.stdin:
    cmd = None
    try:
        im = Image.open(f.strip())
    except Exception as e:
        print(e)
        continue
    if im.size[0] < im.size[1] or im.getexif().get(274, 0) > 4:
        # portrait image
        cmd = portrait_cmd.format(
            fpath=f.strip(),
            outdir=sys.argv[1],
        )
    else:
        landscape_stack.append(f.strip())
        if len(landscape_stack) == 3:
            montages += 1
            cmd = montage_stack()
            landscape_stack = []
    if cmd:
        print('.', end='', flush=True)
        os.system(cmd)
if landscape_stack:
    os.system(montage_stack())
print('')
All that is left to do is uploading the images via rsync, where they are displayed in a FIM-generated slideshow (fim --slideshow=15 -a -o fb -q -u --no-history -R -- ./).
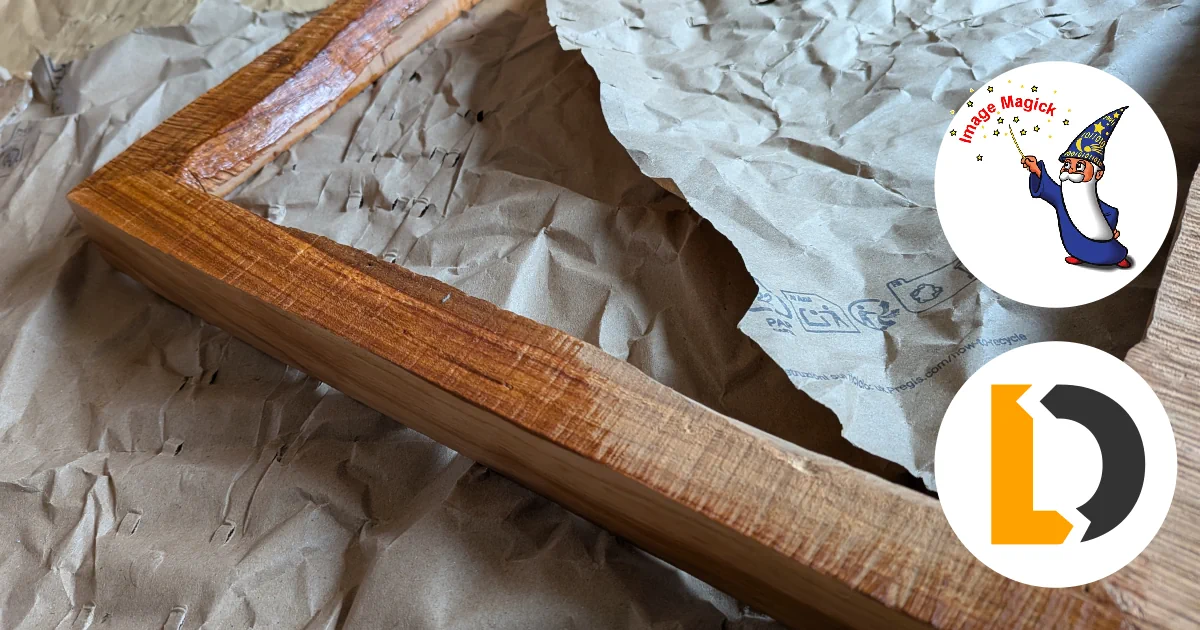
The frame
I built the frame from a piece of cherry wood that I cut into boards with a chainsaw, many years ago. The live edge of the wood is kept and together with the chainsaw marks creates a unique piece. The screen is mounted into a 3mm HDF sheet, with a cutout that fits the screen exactly. On the front, a black-cardboard passe-partout and an acryl glass pane finish the frame. The assembly is mounted in the back into groves cut with a router and is secured by small screws. The rest is hot-glue.

The finished photo frame (front and back).
Over the past weeks, many pictures have rejuvenated memories of friends and family — exactly what I was hoping for. Everything needed to enjoy the pictures is to turn the power on. No cloud, no account, nor terms of use.